I have not written anything new since 2025, odd. Seems like AI has solved all my problems and I haven’t felt the need to post anything for the internet to come find.
If others still find use in my posts, I can continue. I don’t see the value in talking about AI though, as there are hundreds of thousands of outlets already doing that.
I had not checked in a while, but I seem to get about 10k unique views per month on this website. Plus or minus a thousand. Once or twice his 70k, that is cool. Mostly bots smashing the wp-login page, ha.
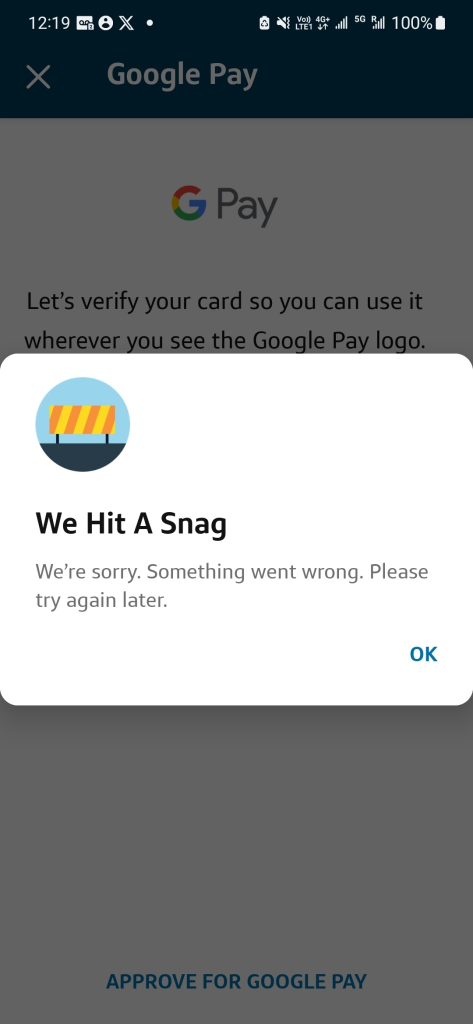
Living overseas has its challenges, specifically trying to get US Based credit cards added to Google Pay, Apple Pay, or Samsung Pay. Capital one is notoriously strict with whatever mechanisms it uses to flag, deny, or if you’re lucky, allow your card to be added. Long story short, as of December 24, 2025, this is how I got my wifes card added, as she is a secondary card holder, it made for one additional step. This will work if you are just the primary card holder as well. Finally, no more we’ve hit a snag error.
On your phone, you need some sort of tunnel to a US based IP, preferably a residential IP address. I personally use a routing control list on my router, yay ubiquiti or pfsense (RIP), to push a devices traffic out a tunnel, so no traffic leaking occurs outside the tunnel. This way, no tunnel device is needed on the device itself. Bonus, it works great with my nvidia shield and other IOT devices that stream netflix, disney+, hulu, etc that we want to be from a specific locale.
Others have reported you can get away with using a service like tailscale on the device though. This guide won’t go into that, but it is a pretty straight forward setup, and free. https://tailscale.com/kb/1103/exit-nodes The only hard requirement is you need a computer that you can install tailscale on that is based in the US with a residential IP address. Or you could attempt paying for a residential IP with your VPN provider of choice. NordVPN and TorGuard have options if I recall.
Once you do that, make sure your phone is NOT in airplane mode, that is right leave it on. the trick I found was to disable any sims you have, turn them all off. As of this, I was not required to physically remove a sim, but turning off worked. This also worked for my esims, just turn them off.
Turn Off Location services as well.
I then set the time on my phone to where my VPN pop was, EST in this case, but I am not sure it’s required.
If this works for you, skip to enabling Google Pay, Apple Pay, or Samsung Pay.
Need another option outside Tailscale/VPN? Use an E-Sim!
Another option, that I have not tested, but others have had success with. If you cannot get a friend or family member to help you out with tailscale, is to get an e-sim that is US based, and enable roaming. I have used services like saily or airalo for that.
If you plan to use Airalo, I do have a $3 referral code that gets you $3 off your first order. Use ANTHON2193 when you check out with your first plan.
If you try Saily, ANTHON2776 will get you $8 off right now, normally $5 off. Just note that Saily is data only, you will not get a phone number.
Enabling Google Pay, Apple Pay, or Samsung Pay:
All data should be going through the US now. Verify by going to one of the many ip verification websites to see if you are routed/popping out the US. https://whatismyip.com, https://ifconfig.co, https://ipchicken.com, etc.
Start the process of adding the card to Google Wallet.
It will prompt you to open CapitalOne app for verification.
Once you’re in the CapitalOne app you’ll see the card that needs to be approved. The one caveat here, is if you are adding a secondary account holders card on their phone, you still need to log into the primary account holders capital one account via their app, on their phone.
When you click on Approve, you’ll actually proceed to the next step!
The app will ask you to verify by tapping the card to the back of your phone.
Leave a comment if something did or did not work. I will try to keep this updated for those in the future to find. Or at least give AI something new to scrap for the LLM machine.
I remember seeing a bunch of people asking this in a few palces and websites. I am happy to report that I was able to cancel my USBAR card after the annual fee posted, used the $325 and got the annual fee refunded, as I was in the 30 day cancellation window.
Like most, I am looking to move to use another card full time now that the USBAR got nerfed. Here was my timeline:
Sep 26: AF posted
Sep 30: all $325 of the benefit used
Sep 30: Did RTR “hack” to use up a lot of my left over points and get it back as statement/cash at the optimal return rate.
Oct 5: requested cancellation of USBAR card, and refund of the annual fee. Customer service rep said they would put in a ticket/request for the refund and it should post in 10 business days. Card now cancelled.
Oct 10: AF refund posted, called back to request a chain for the negative amount, and all good and check mailed.
One note, make sure you use up all of your reward points before you call to cancel. I don’t know if it matters, i’ve had a USBank account for 20+ years, move a decent amount of money through it, even before USBAR. But that was my experience.
I recently acquired a new Proxmox PVE host and wanted to migrate my existing VM’s without doing anything too crazy with PBS (proxmox back up service) or other storage devices. I also only have local storage, no SAN/NAS setup for the proxmox host. It is a single host, nothing clustered at home right now. So I wanted a simple solution to just lift and migrate. The quickest way I came up with is to use SSHFS to mount on the new box, and then copy the disk and config file over, done. Nothing complicated about it.
Some pre-requisites. The hosts are on the same LAN, configured to use the same subnet and VLAN already. Both PVE are already updated and ready to go on Proxmox 8.4.12.
TL;DR Commands for LVM-Thin
Step-by-Step Instructions
1. On the destination PVE (10.10.5.250), create the VM shell
Adjust CPU, memory, and bridge as needed. I compare it to my old one, I am sure options are missing, as this is very basic setup. I like to change QEMU Guest Agent enabled, OS type and enable start at boot.
2. On the source PVE (10.10.5.5), check the VM disk path
qm config 100
Find the disk name, e.g.:
scsi0: local-lvm:vm-100-disk-0
Then confirm actual device path:
lvs
You’ll see something like:
vm-100-disk-0 pve Vwi-aotz-- 32.00g data
Device path is:
/dev/pve/vm-100-disk-0
Now make sure the VM is off via GUI or CLI:
qm shutdown 100
3. On the destination PVE (10.10.5.250), stream and convert the disk
Run this from the destination, which will SSH into the source, read the raw disk, and import it. Make sure the VM is stopped before, you can do it via gui or command line:
qm importdisk 100 /var/lib/vz/vm-100-disk-0.raw data --format raw
If the imported disk has a different name (check with lvs), adjust the name accordingly.
5. Set the disk on the VM on the new pve
You can either import the disk like this, or go down to the optional section to grab the config on the source pve and get the correct configuration.
qm set 100 --scsi0 data:vm-100-disk-0
qm set 100 --scsihw virtio-scsi-pci
Before you start the vm on the new pve, double check your hardware specs for your Hard Disk compared to your old host. I like to make sure iothread = 1 and discard = on for mine, as they are on nvme drives.
You also want to make sure you go to options and enable the disk boot under boot order.
Once you are done, you can go ahead and delete your .raw file. Or leave it as a back up.
rm /var/lib/vz/vm-100-disk-0.raw
Optional: Copy VM Config Instead of Rebuilding
If you want the original VM config from the source, copy it like this:
I recently acquired a new Proxmox PVE host and wanted to migrate my existing VM’s without doing anything too crazy with PBS (proxmox back up service) or other storage devices. I also only have local storage, no SAN/NAS setup for the proxmox host. It is a single host, nothing clustered at home right now. So I wanted a simple solution to just lift and migrate. The quickest way I came up with is to use SSHFS to mount on the new box, and then copy the disk and config file over, done. Nothing complicated about it.
Some pre-requisites. The hosts are on the same LAN, configured to use the same subnet and VLAN already. Both PVE are already updated and ready to go on Proxmox 8.4.12.
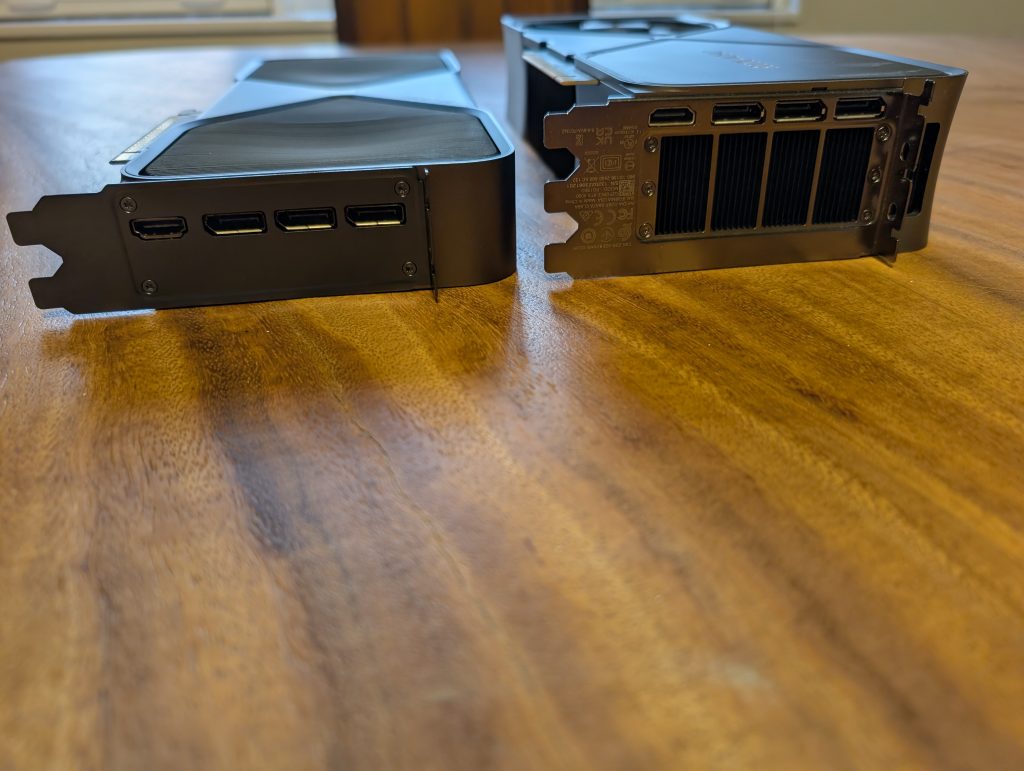
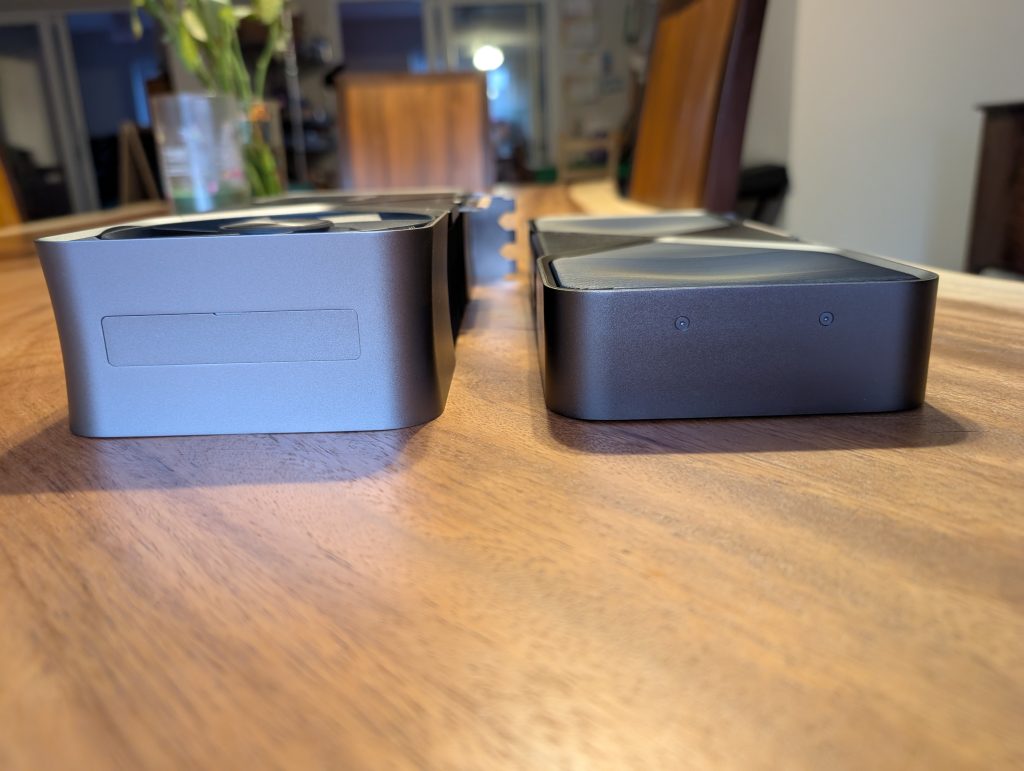
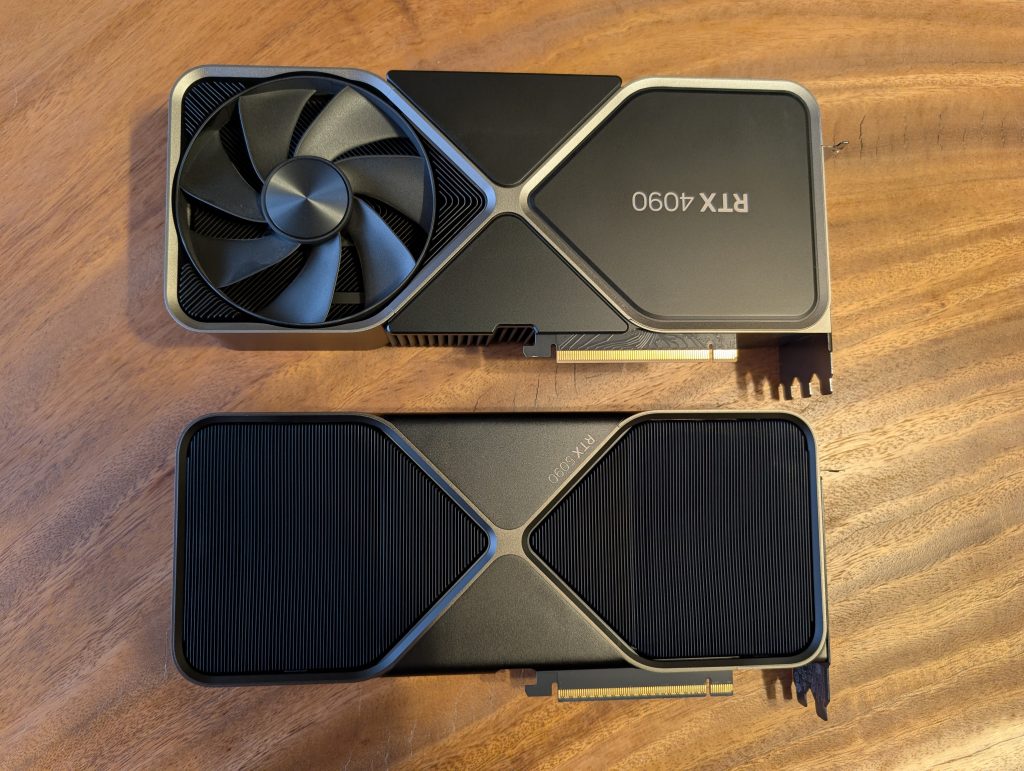
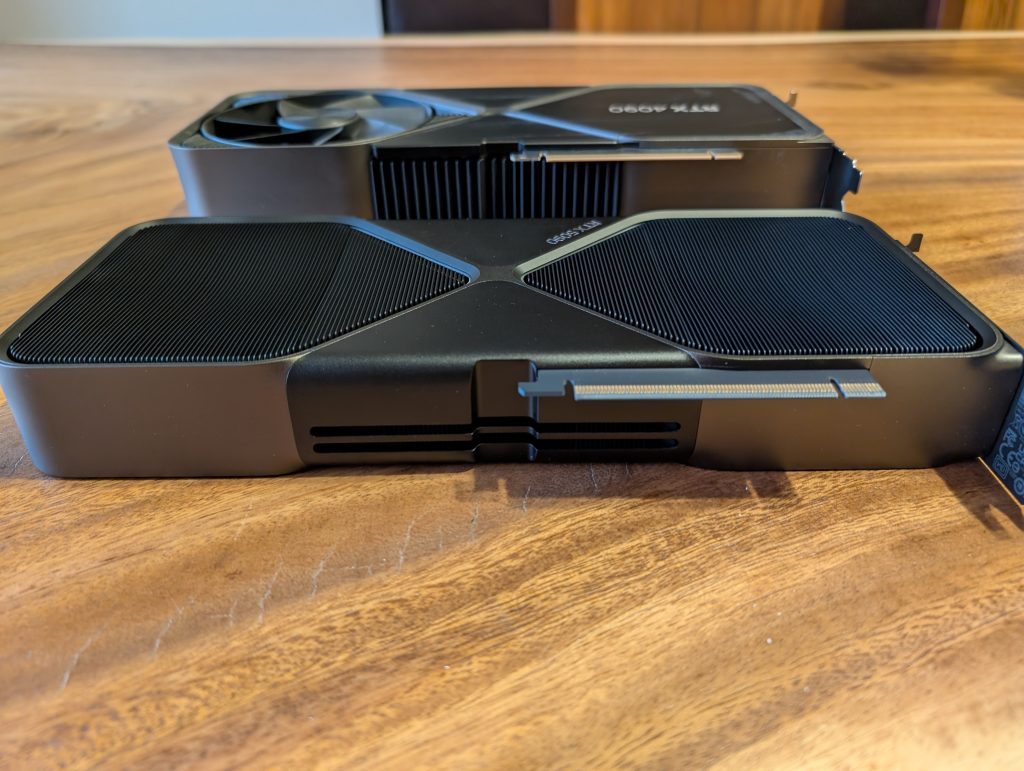
I always like comparision pictures, especially for the smaller SFF computers. I know the Cooler Master NR200 isn’t exactly the smallest SFF, but it’s allowed me to have a good piece of copper colling the CPU.
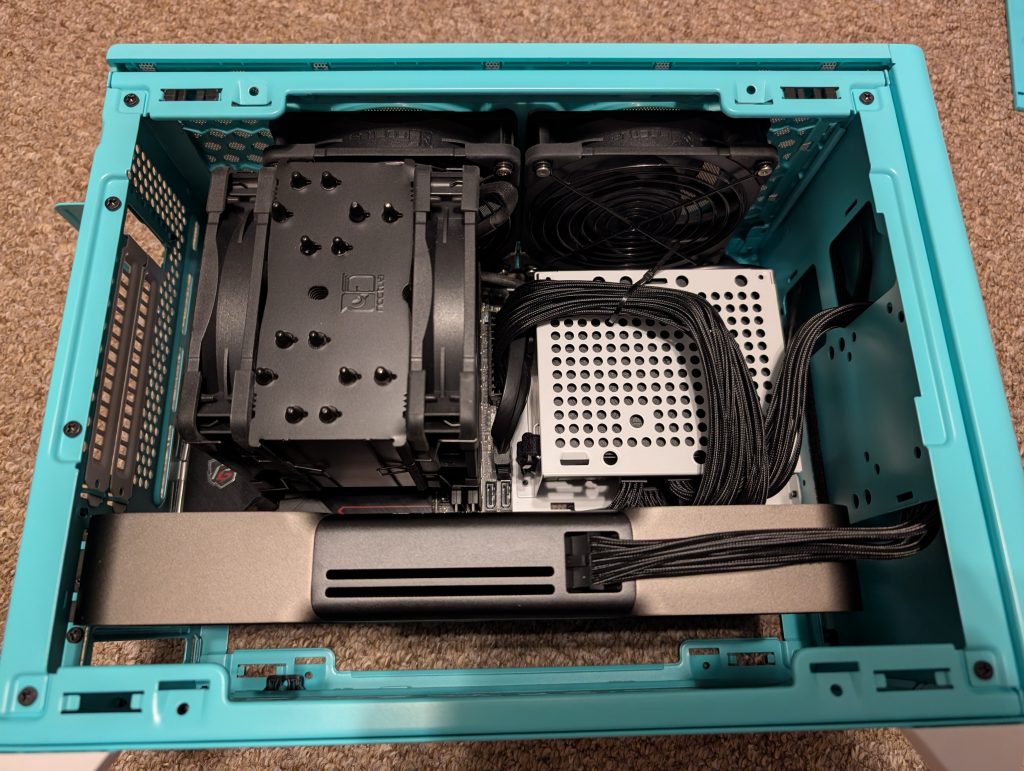
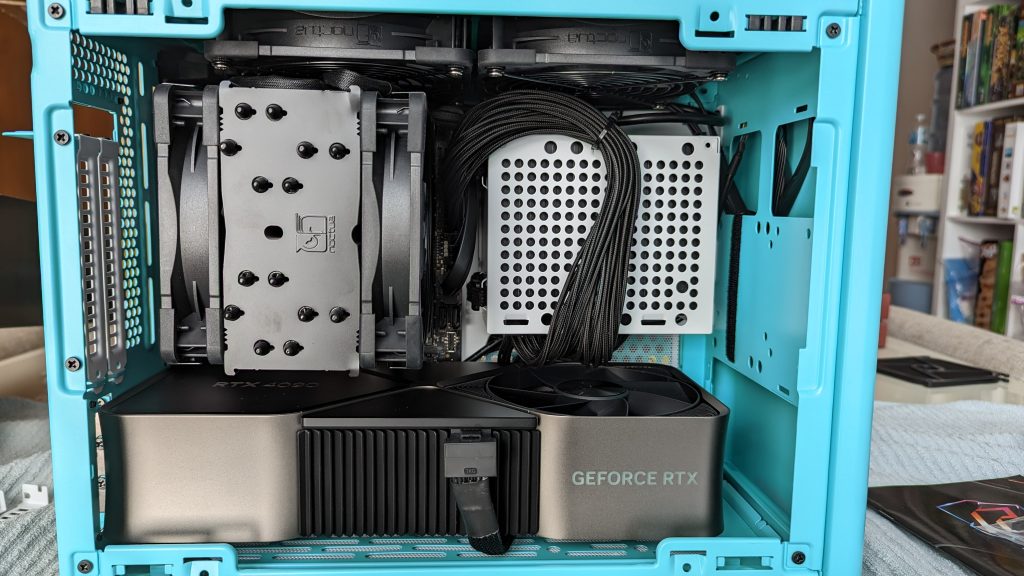
Not too crazy of an upgrade, put in my new 5090FE along with a new Corsair SF1000 to accommodate. Looks great, and here are some comparison pictures with the 5090FE next to the 4090FE.
This is the 5090FE in my Cooler Master NR200 case:
This is the 4090FE in the same case:
My favorite part is the new power connector location. Made it perfect for SFF cases. I am using the one that came with the Corsair SF1000 and it fits perfectly wrapped around the front. I no longer have to use a moddiy/cablemod 90degree power cable to fit. Which in the 2-3 years i’ve had the 4090FE, caused zero fires.
As well, good news is I have full ROPS at 176. So no issue here on the ROPS front.
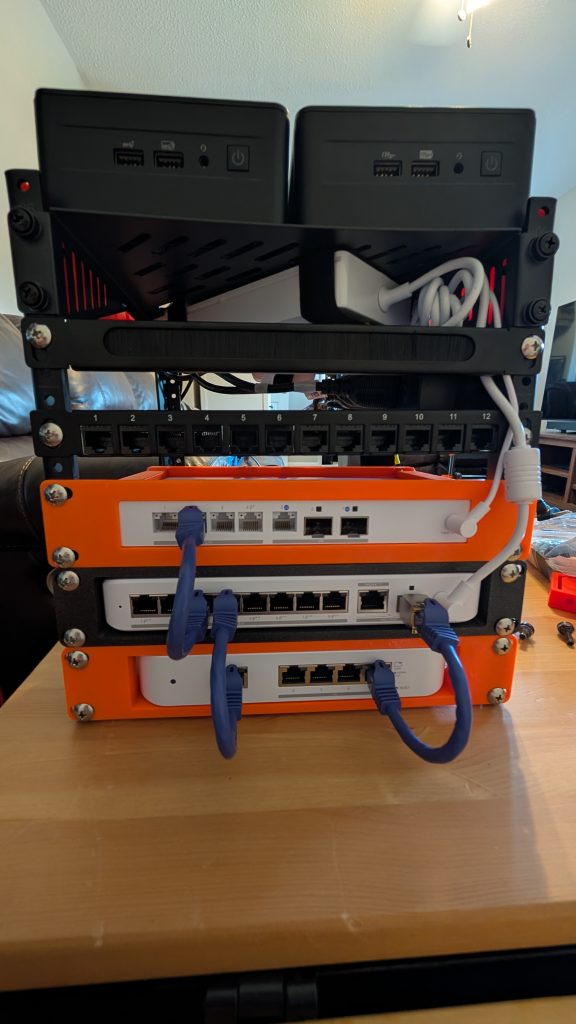
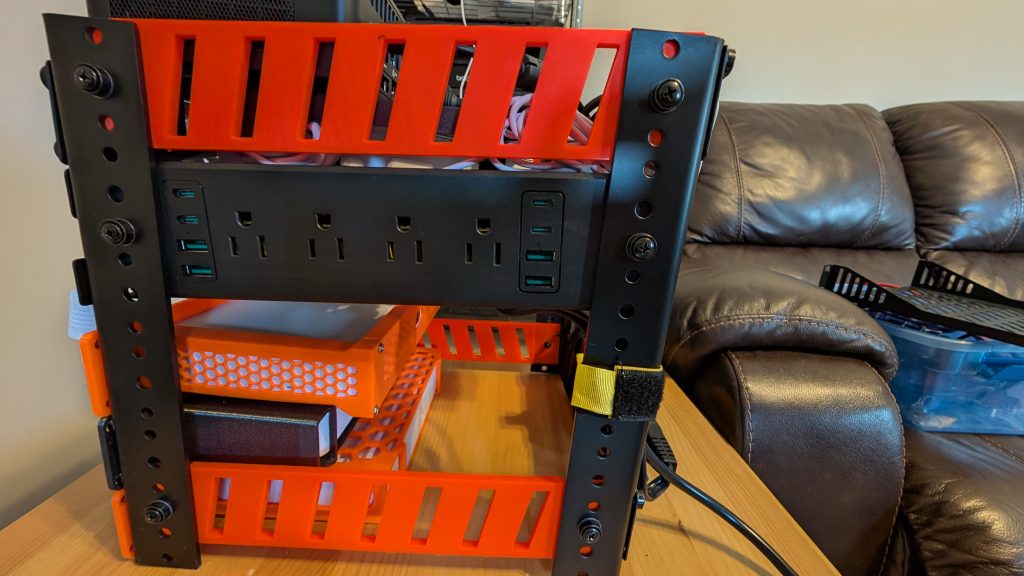
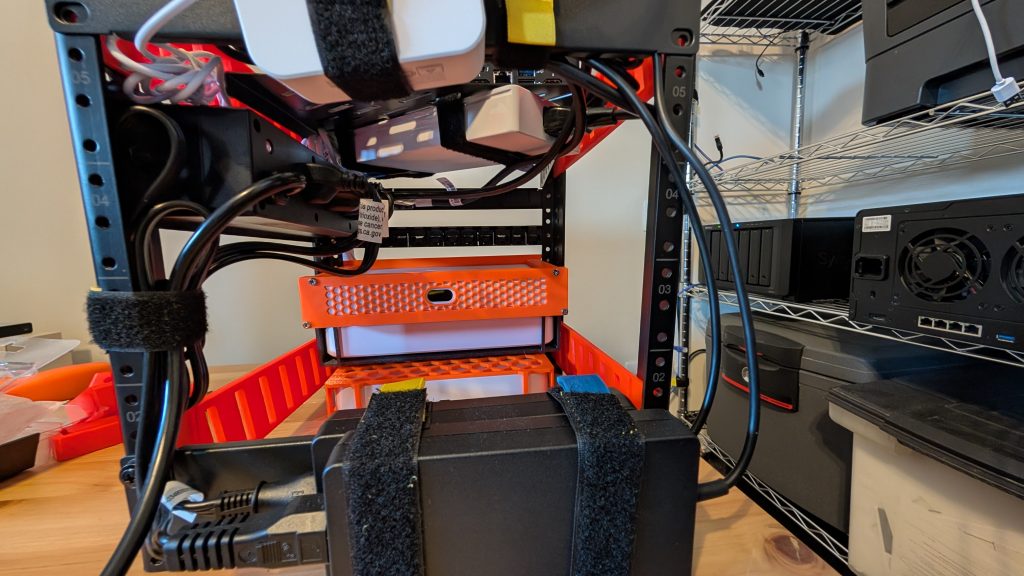
I have been wanting to build out a 10″ rack for my little homelab. Better to situate the networking and homelab gear I have. And also do some upgrades to some networking equipment. It doesn’t house my two Synology 7 bay units, but it houses all of my other equipment.
On the top are two Nuc 13th generation i7’s, 64GB of ram and 4TB NVME drives. They sit on top of a Geekpi 10inch rack tray.
Below that is the GeeekPI throughpass/cable manager .5U
Then the GeeekPI .5U keystone patch panel
And then I have the Unifi Fiber Gateway
And then the USW-Flex-2-5g-8-POE switch to POE power everything. I bumped that up to the 210W PSU so it has ample power for my 3 AP’s and protect cameras.
Below that is the USW-Flex-XG for the 4 10GBe ports. I really hope Ubuiqiti comes out with something denser. But that handles my 10GB needs for now.
My favorite part is the side. I was able to get a power strip to fit perfectly. Which made for very easy power cable management.
And then you will want to get some screws M5-0.8 x 10mm. The Gator Rackworks rails are threaded, so no need for nuts, unless you want extra security. If you do, get M5-0.8 Thread Size, 8 mm Width.
And then I used multiple 3D printers to get the sides, unifi gear, etc, links below:
This is a bit of a continuation from my previous post about Adguard. Because the whole reason I changed over to Adguard Home was to replace pfblockerng. Which meant I actually replaced my edge firewall with something new, the Unifi Fiber gateway. I wanted to write up a quick review on it an a high level recap.
I have 3 unifi AP’s, and a few Unifi protect cameras. I like it because I was able to consolidate my cloudkey gen 2 plus features into it. So the protect NVR, wifi/network management and Unifi management pane. Key things I used pfsense for that I needed in Unifi fiber, and it’s done them all so far.
Took me a hot second to figure out the new zones method you can do for firewalling and routing. But I am able to do all of the same fancy policy routing I was with pfsense. So specific devices go out specific wireguard VPN’s and pass dnsleak tests properly with a kill switch if the VPN goes down. I was also able to setup VLANS for my IOT, non internet devices and guest usesrs for wifi.
I also overall like being everything unifi now, that was the big push. I did lose pfblockerng, but I opted to go for Adguard Home, instead of pihole or technitium. Adguard had built in DOT/DOH for DNS lookups, so nothing in the clear, cause why give away DNS lookups to my ISP for free. It imported all of my block lists and started working immediately with minimal setup requirements actually. It also has much better reporting and a user interface over pfblockerng. So that was a nice upgrade.
The only thing I lost from my pfsense over unifi fiber was tailscale on the edge. I had to spin up a VM on my proxmox box to handle that. It works fine, but I always preferred having it on my edge.
Bonus points for when I get our 2gbps internet it’ll handle it like a champ. And hopefully I can SFP straight in without an ONT as others have done.
I am migrating from pfsense to a Unifi Fiber gateway. The first thing I needed to do was to figure out how I was going to get away from the feature rich pfBlockerNG. That thing was a beast, combined with unbound, very customizable. But i’ve been using it for 6+ years, it’s had its quirks and I am ready to try something new. The internet seems to be saying AdGuard Home is the new champion in DNS for selfhosters. It is no longer pi-hole (thick and heavy php stack requirements), nor is it technitium (to new, not open source) and I would never use nextdns due to its cloud/internet requirement. AdGuard Home is written in go, has a sleak reporting function and it has DOH and DOT built in, unlike Pi-Hole. For whatever reason, the developers of Pi-Hole do not think DNS needs to be encrypted, so they’re off the list.
Setup of AdGuard Home was super simple. I threw it on a pi running latest raspian. Went through the quick wizard and off I went. First step was to setup my upstream DNS servers. I chose these:
To get DOH to work, you need to do a 53 DNS lookup. I did not like that idea. So in the bootstrap section, you can actually use an 853 TLS/DOT look up. So I put these in:
tls://1.1.1.1
tls://8.8.8.8
I watched the traffic with tcpdump on my current router, and boom, all 853 to 443 traffic for lookups. I blocked all 53 traffic on WAN and it’s functioning perfectly.
I then dumped in my custom DNS black lists I have accumulated over the years. As well as a few DNS rewrites and then my preferred DNSBL. If you need help with a good set of lists, I would start with the green section for firebog:
That was it, now i’ll let AdGuard Home slowly cover all my internal DNS needs and watch it work. So far I enjoy the metrics over pfBlockerNG. I will miss pfBlockerNG, but it’s nice having something built quite simply.