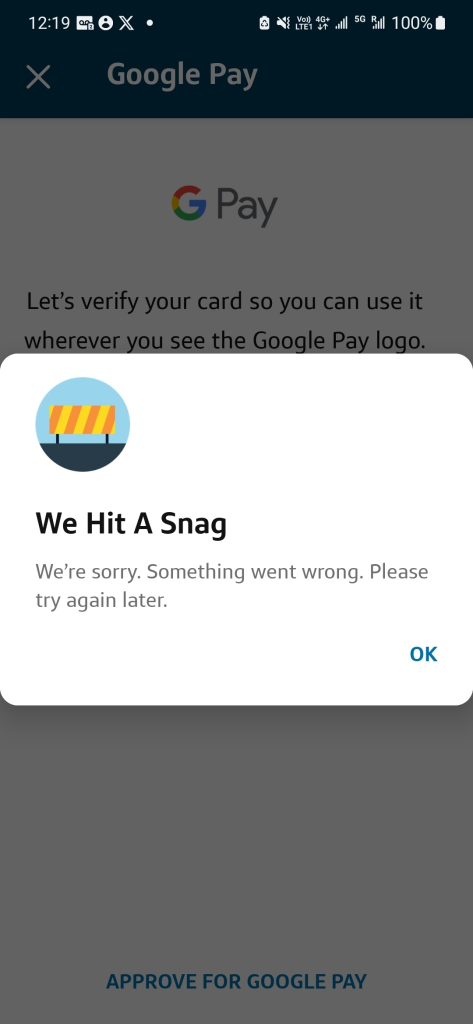
Categories
Uncategorized

Proxmox migrate VM’s from one PVE to another PVE with LVM-thin

I recently acquired a new Proxmox PVE host and wanted to migrate my existing VM’s without doing anything too crazy with PBS (proxmox back up service) or other storage devices. I also only have local storage, no SAN/NAS setup for the proxmox host. It is a single host, nothing clustered at home right now. So I wanted a simple solution to just lift and migrate. The quickest way I came up with is to use SSHFS to mount on the new box, and then copy the disk and config file over, done. Nothing complicated about it.

Some pre-requisites. The hosts are on the same LAN, configured to use the same subnet and VLAN already. Both PVE are already updated and ready to go on Proxmox 8.4.12.

TL;DR Commands for LVM-Thin

Step-by-Step Instructions


1. On the destination PVE (10.10.5.250), create the VM shell

qm create 100 --name migrated-vm --memory 2048 --cores 2 --net0 virtio,bridge=vmbr0

Adjust CPU, memory, and bridge as needed. I compare it to my old one, I am sure options are missing, as this is very basic setup. I like to change QEMU Guest Agent enabled, OS type and enable start at boot.


2. On the source PVE (10.10.5.5), check the VM disk path

qm config 100

Find the disk name, e.g.:

scsi0: local-lvm:vm-100-disk-0

Then confirm actual device path:

lvs

You’ll see something like:

  vm-100-disk-0  pve Vwi-aotz-- 32.00g data

Device path is:

/dev/pve/vm-100-disk-0

Now make sure the VM is off via GUI or CLI:

qm shutdown 100


3. On the destination PVE (10.10.5.250), stream and convert the disk

Run this from the destination, which will SSH into the source, read the raw disk, and import it. Make sure the VM is stopped before, you can do it via gui or command line:

apt install pv -y
ssh root@10.10.5.5 "cat /dev/pve/vm-100-disk-0" | pv > /var/lib/vz/vm-100-disk-0.raw

4. Attach the disk to the new VM

After import completes, attach the new disk:

qm importdisk 100 /var/lib/vz/vm-100-disk-0.raw data --format raw

If the imported disk has a different name (check with lvs), adjust the name accordingly.


5. Set the disk on the VM on the new pve

You can either import the disk like this, or go down to the optional section to grab the config on the source pve and get the correct configuration.

qm set 100 --scsi0 data:vm-100-disk-0
qm set 100 --scsihw virtio-scsi-pci

Before you start the vm on the new pve, double check your hardware specs for your Hard Disk compared to your old host. I like to make sure iothread = 1 and discard = on for mine, as they are on nvme drives.

You also want to make sure you go to options and enable the disk boot under boot order.

Once you are done, you can go ahead and delete your .raw file. Or leave it as a back up.

rm /var/lib/vz/vm-100-disk-0.raw

Optional: Copy VM Config Instead of Rebuilding

If you want the original VM config from the source, copy it like this:

scp root@10.10.5.5:/etc/pve/qemu-server/100.conf /etc/pve/qemu-server/

Then attach the disk:

qm set 100 --scsi0 local-lvm:vm-100-disk-0

Categories
General Computing

Proxmox migrate VM’s from one PVE to another PVE with qcow2

I recently acquired a new Proxmox PVE host and wanted to migrate my existing VM’s without doing anything too crazy with PBS (proxmox back up service) or other storage devices. I also only have local storage, no SAN/NAS setup for the proxmox host. It is a single host, nothing clustered at home right now. So I wanted a simple solution to just lift and migrate. The quickest way I came up with is to use SSHFS to mount on the new box, and then copy the disk and config file over, done. Nothing complicated about it.

Some pre-requisites. The hosts are on the same LAN, configured to use the same subnet and VLAN already. Both PVE are already updated and ready to go on Proxmox 8.4.12.

TL;DR Commands for QCOW2

apt install sshfs -y
mkdir /mnt/pve-target
sshfs root@target:/var/lib/vz /mnt/pve-target
qm shutdown
rsync -ah /var/lib/vz/images// /mnt/pve-target/images//
scp /etc/pve/qemu-server/.conf root@target:/etc/pve/qemu-server/
umount /mnt/pve-target

Step-by-Step Guide


1. Install SSHFS (on source or destination)

On the node where you’ll mount the remote PVE:

apt update && apt install sshfs -y


2. Create mount point and mount remote storage

On source node (where VM currently lives), mount the target PVE via SSHFS:

mkdir /mnt/pve-target
sshfs root@<target-node-ip>:/var/lib/vz /mnt/pve-target

Replace <target-node-ip> with your destination PVE’s IP.


3. Stop the VM to ensure consistent disk

qm shutdown &lt;vmid>

Check if it’s down:

qm status &lt;vmid>


4. Move VM disk(s) to SSHFS mount

Assuming the VM disk is on local storage (/var/lib/vz/images/<vmid>/):

rsync -ah --progress /var/lib/vz/images/&lt;vmid>/ /mnt/pve-target/images/&lt;vmid>/

If the directory doesn’t exist on target:

mkdir /mnt/pve-target/images/&lt;vmid>

You can also use scp instead of rsync, but rsync gives progress and is resumable.


5. Copy VM config

Configs are stored in /etc/pve/qemu-server/<vmid>.conf.

Copy it over:

scp /etc/pve/qemu-server/&lt;vmid>.conf root@&lt;target-node-ip>:/etc/pve/qemu-server/


6. Unmount SSHFS

umount /mnt/pve-target


7. Start VM on target node

Log into target PVE and run:

qm start &lt;vmid>

Check:

qm status &lt;vmid>


Optional Cleanup

If you want to delete the VM from the source PVE:

qm destroy &lt;vmid>

Make sure the migration is successful before doing this.


Tips

  • If your VM uses local-lvm, you’ll need to:
    • Convert the disk to a raw file (with qemu-img convert)
    • Or attach the disk as a block device and copy it differently.
      Let me know if that’s your setup, and I’ll walk you through that too.
Categories
Computer Hardware

5090FE vs 4090FE in pictures comparision

I always like comparision pictures, especially for the smaller SFF computers. I know the Cooler Master NR200 isn’t exactly the smallest SFF, but it’s allowed me to have a good piece of copper colling the CPU.

Not too crazy of an upgrade, put in my new 5090FE along with a new Corsair SF1000 to accommodate. Looks great, and here are some comparison pictures with the 5090FE next to the 4090FE.

This is the 5090FE in my Cooler Master NR200 case:

This is the 4090FE in the same case:

My favorite part is the new power connector location. Made it perfect for SFF cases. I am using the one that came with the Corsair SF1000 and it fits perfectly wrapped around the front. I no longer have to use a moddiy/cablemod 90degree power cable to fit. Which in the 2-3 years i’ve had the 4090FE, caused zero fires.

As well, good news is I have full ROPS at 176. So no issue here on the ROPS front.

Categories
Cisco General Computing

issues sshing into older cisco switches – rsa errors

If you ever had RSA errors trying to log into an older cisco switch from a newer version of openssh, you can get past it by running this

ssh \
  -o KexAlgorithms=+diffie-hellman-group14-sha1,diffie-hellman-group-exchange-sha1 \
  -o HostKeyAlgorithms=+ssh-rsa \
  -o PubkeyAcceptedAlgorithms=+ssh-rsa \
  -o RequiredRSASize=1024 \
  admin@192.168.170.2

Replace your IP address and user as needed, the example above it is admin and 192.168.170.2 Enjoy 🙂

Categories
Networking

10 inch 3D printed homelab minirack

I have been wanting to build out a 10″ rack for my little homelab. Better to situate the networking and homelab gear I have. And also do some upgrades to some networking equipment. It doesn’t house my two Synology 7 bay units, but it houses all of my other equipment.

Inspiration goes to this reddit post: https://old.reddit.com/r/homelab/comments/1j25l1t/my_camper_rack/

FRONT VIEW

On the top are two Nuc 13th generation i7’s, 64GB of ram and 4TB NVME drives. They sit on top of a Geekpi 10inch rack tray.

Below that is the GeeekPI throughpass/cable manager .5U

Then the GeeekPI .5U keystone patch panel

And then I have the Unifi Fiber Gateway

And then the USW-Flex-2-5g-8-POE switch to POE power everything. I bumped that up to the 210W PSU so it has ample power for my 3 AP’s and protect cameras.

Below that is the USW-Flex-XG for the 4 10GBe ports. I really hope Ubuiqiti comes out with something denser. But that handles my 10GB needs for now.

My favorite part is the side. I was able to get a power strip to fit perfectly. Which made for very easy power cable management.

RIGHT SIDE VIEW

REAR VIEW

That power strip is a: HHSOET 16 in 1 Recessed Power Strip that you can find on amazon: https://www.amazon.com/dp/B0CXGXFYV2

The 4 metal posts are Gator Rackworks. You’ll want a total of 4. https://www.amazon.com/dp/B072B9H3FC

And then you will want to get some screws M5-0.8 x 10mm. The Gator Rackworks rails are threaded, so no need for nuts, unless you want extra security. If you do, get M5-0.8 Thread Size, 8 mm Width.

And then I used multiple 3D printers to get the sides, unifi gear, etc, links below:

UCG FIBER:
https://www.printables.com/model/1220530-ucg-fiber-rack-mount-bracket-1u-10-inch

USW-FLEX-2.5GB 8 PORT POE
https://makerworld.com/en/models/1024496-usw-flex-2-5g-8-poe-10-inch-rack-mount#profileId-1006423

USW-Flex-XG switch:
https://www.printables.com/model/1089225-unifi-usw-flex-xg-10-inch-rack-mount

SIDES:

https://www.printables.com/model/275203-10in-home-server-project/files

I plan to upgrade to these sides though, they will likely hold better:

https://www.printables.com/model/1279862-remix-diy-10-inch-rack-for-gator-rackworks-rails/files

Categories
Networking

Migrating from pfsense to Unifi Fiber

This is a bit of a continuation from my previous post about Adguard. Because the whole reason I changed over to Adguard Home was to replace pfblockerng. Which meant I actually replaced my edge firewall with something new, the Unifi Fiber gateway. I wanted to write up a quick review on it an a high level recap.

I have 3 unifi AP’s, and a few Unifi protect cameras. I like it because I was able to consolidate my cloudkey gen 2 plus features into it. So the protect NVR, wifi/network management and Unifi management pane. Key things I used pfsense for that I needed in Unifi fiber, and it’s done them all so far.

Took me a hot second to figure out the new zones method you can do for firewalling and routing. But I am able to do all of the same fancy policy routing I was with pfsense. So specific devices go out specific wireguard VPN’s and pass dnsleak tests properly with a kill switch if the VPN goes down. I was also able to setup VLANS for my IOT, non internet devices and guest usesrs for wifi.

I also overall like being everything unifi now, that was the big push. I did lose pfblockerng, but I opted to go for Adguard Home, instead of pihole or technitium. Adguard had built in DOT/DOH for DNS lookups, so nothing in the clear, cause why give away DNS lookups to my ISP for free. It imported all of my block lists and started working immediately with minimal setup requirements actually. It also has much better reporting and a user interface over pfblockerng. So that was a nice upgrade.

The only thing I lost from my pfsense over unifi fiber was tailscale on the edge. I had to spin up a VM on my proxmox box to handle that. It works fine, but I always preferred having it on my edge.

Bonus points for when I get our 2gbps internet it’ll handle it like a champ. And hopefully I can SFP straight in without an ONT as others have done.

Categories
General Computing

Forcing AdGuard Home to disable 53 lookups at bootstrap

I am migrating from pfsense to a Unifi Fiber gateway. The first thing I needed to do was to figure out how I was going to get away from the feature rich pfBlockerNG. That thing was a beast, combined with unbound, very customizable. But i’ve been using it for 6+ years, it’s had its quirks and I am ready to try something new. The internet seems to be saying AdGuard Home is the new champion in DNS for selfhosters. It is no longer pi-hole (thick and heavy php stack requirements), nor is it technitium (to new, not open source) and I would never use nextdns due to its cloud/internet requirement. AdGuard Home is written in go, has a sleak reporting function and it has DOH and DOT built in, unlike Pi-Hole. For whatever reason, the developers of Pi-Hole do not think DNS needs to be encrypted, so they’re off the list.

Setup of AdGuard Home was super simple. I threw it on a pi running latest raspian. Went through the quick wizard and off I went. First step was to setup my upstream DNS servers. I chose these:

https://dns10.quad9.net/dns-query
https://dns.cloudflare.com/dns-query
https://dns.mullvad.net/dns-query
https://dns.google/dns-query

To get DOH to work, you need to do a 53 DNS lookup. I did not like that idea. So in the bootstrap section, you can actually use an 853 TLS/DOT look up. So I put these in:

tls://1.1.1.1
tls://8.8.8.8

I watched the traffic with tcpdump on my current router, and boom, all 853 to 443 traffic for lookups. I blocked all 53 traffic on WAN and it’s functioning perfectly.

I then dumped in my custom DNS black lists I have accumulated over the years. As well as a few DNS rewrites and then my preferred DNSBL. If you need help with a good set of lists, I would start with the green section for firebog:

https://firebog.net

That was it, now i’ll let AdGuard Home slowly cover all my internal DNS needs and watch it work. So far I enjoy the metrics over pfBlockerNG. I will miss pfBlockerNG, but it’s nice having something built quite simply.

Categories
General Computing Operating Systems

Format USB drive to FAT32 in a 32GB and larger thumbdrive world

I always need a FAT32 formatted drive so that I can upgrade some firmware or BIOS updates. I also need FAT32 for things like network equipment that only take FAT32 still, even the new stuff, looking at you Cisco. You can format a larger 64GB+ thumb drive with Microsoft Windows 11 natively, no need for extra apps. You can use the built in diskpart utility.

First step is to hit your windows key, and type CMD. Right click CMD and run it as administrator. Then you can drop into diskpark:

diskpart
list disk
select disk X (select the disk you know is yours)
clean
create partition primary size=32768
select partition 1
format fs=fat32 quick
exit

Done, now you have a drive that is fat32 formatted and you can dump your files on it that you need.

Categories
Linux

AlmaLinux 8 fails GPG key check

Are you getting these errors trying to install new packages or update your existing packages? Does it look something like this?

sudo dnf upgrade almalinux-release
Last metadata expiration check: 1:48:55 ago on Tue 28 May 2024 08:39:46 PM PDT.
Dependencies resolved.
=========================================================================================================
 Package                        Architecture        Version                    Repository           Size
=========================================================================================================
Upgrading:
 almalinux-release              x86_64              8.10-1.el8                 baseos               27 k

Transaction Summary
=========================================================================================================
Upgrade  1 Package

Total size: 27 k
Is this ok [y/N]: y
Downloading Packages:
[SKIPPED] almalinux-release-8.10-1.el8.x86_64.rpm: Already downloaded
AlmaLinux 8 - BaseOS                                                     3.3 MB/s | 3.4 kB     00:00
Importing GPG key 0xC21AD6EA:
 Userid     : "AlmaLinux <packager@almalinux.org>"
 Fingerprint: E53C F5EF 91CE B0AD 1812 ECB8 51D6 647E C21A D6EA
 From       : /etc/pki/rpm-gpg/RPM-GPG-KEY-AlmaLinux
Is this ok [y/N]: y
Key imported successfully
Import of key(s) didn't help, wrong key(s)?
Public key for almalinux-release-8.10-1.el8.x86_64.rpm is not installed. Failing package is: almalinux-release-8.10-1.el8.x86_64
 GPG Keys are configured as: file:///etc/pki/rpm-gpg/RPM-GPG-KEY-AlmaLinux
The downloaded packages were saved in cache until the next successful transaction.
You can remove cached packages by executing 'dnf clean packages'.
Error: GPG check FAILED

There is a quick and easy fix that works as of Aug 2024. Run this on your OS, this will import the latest GPG keys:

rpm --import https://repo.almalinux.org/almalinux/RPM-GPG-KEY-AlmaLinux

Then run this to update yum/dnf:

dnf upgrade almalinux-release

Then you should be all good for you yum upgrade and install needs!

Categories
Google chrome Software

Removing google Chrome drop down in tab bar – March 2024

Updated chrome to 123.0.6312.58, and they re added the drop down in the top left, again. OY, this is getting old Google. They need to stop forcing these UX changes. If you see this:

and want to remove it, open up a new tab in chrome and go to chrome://flags and disable “Customize Chrome Side Panel” If this is your first time dealing with these changes, also disable “Chrome Refresh 2023“. Once done, it will look like this:

Relaunch chrome and the drop downs in the tab bar is gone.